Chocolate Cheesecake Truffles
Highlighted under: Pastry Dreams
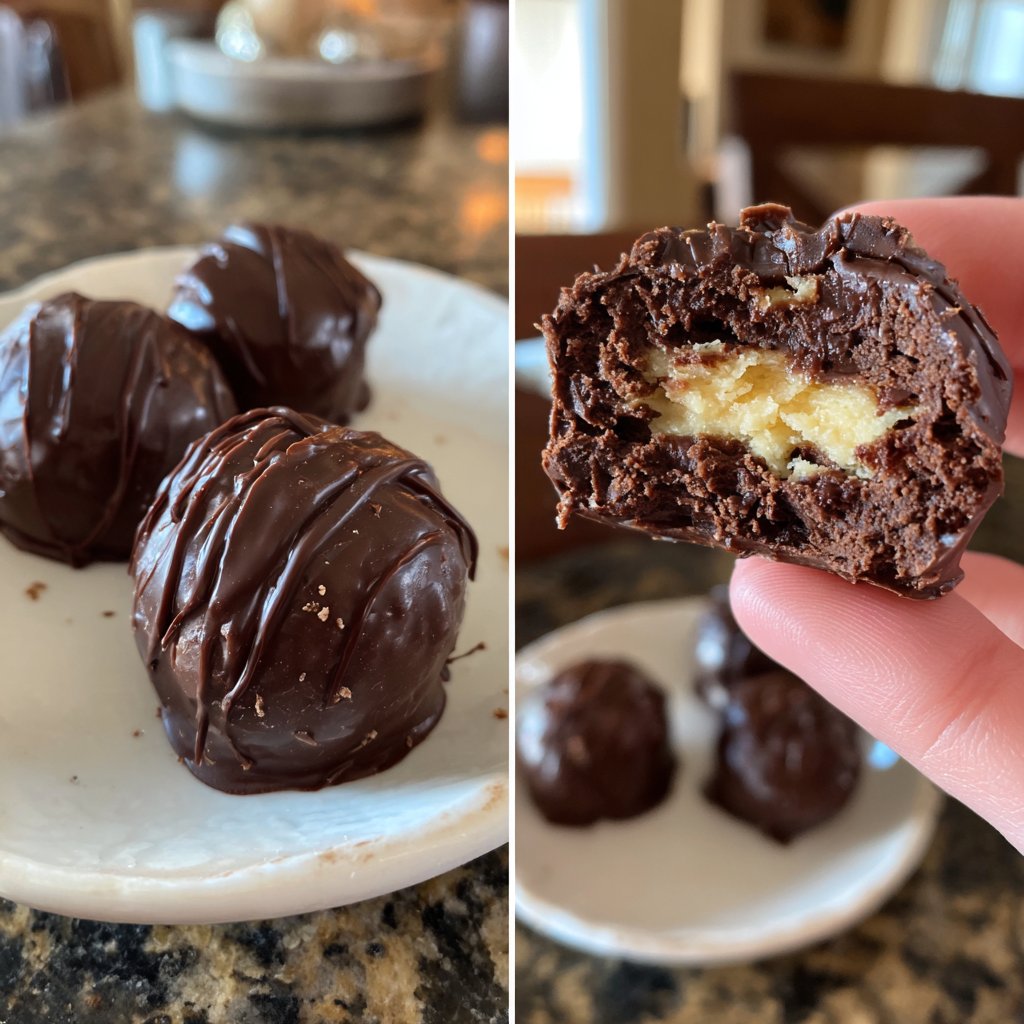
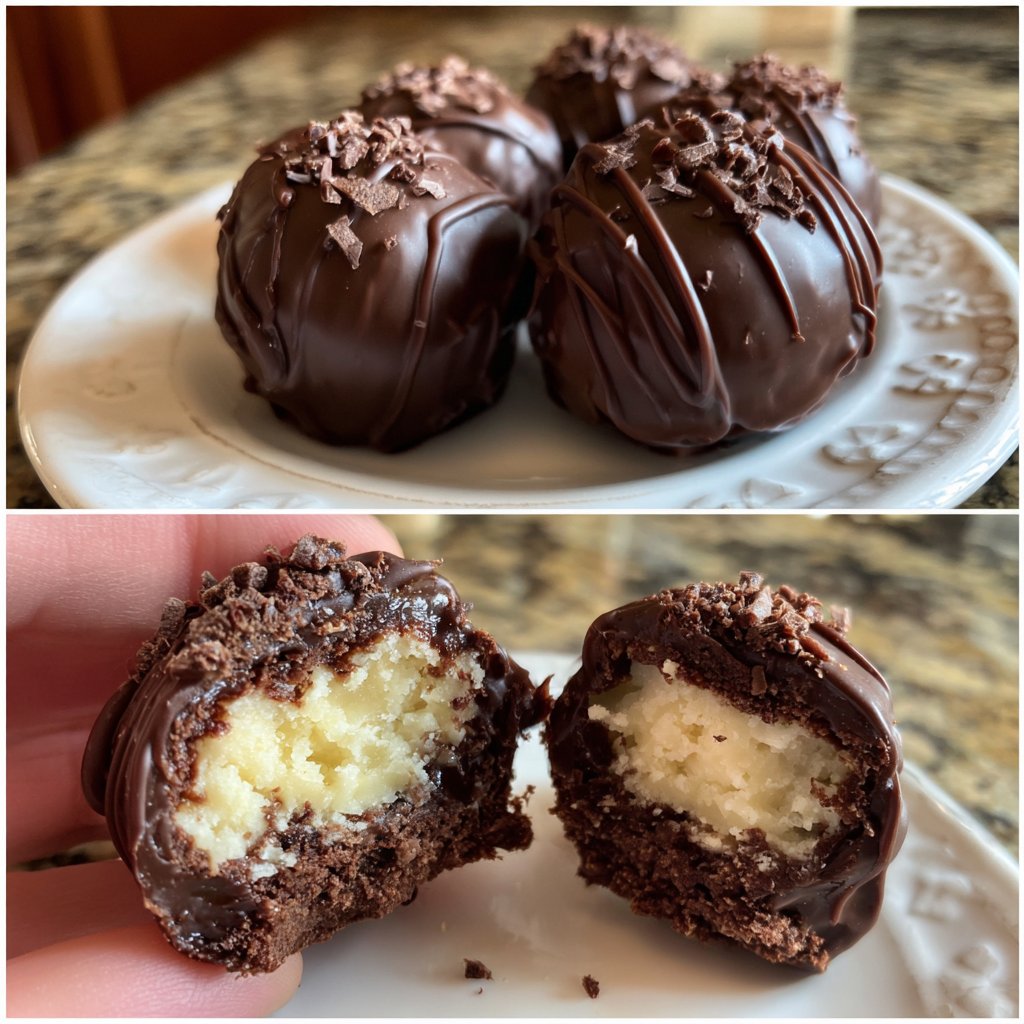
I absolutely adore making chocolate cheesecake truffles because they blend two of my favorite desserts into a delicious bite-sized treat. The creamy cheesecake center complements the rich, decadent chocolate coating perfectly, creating a delightful explosion of flavor in every bite. These truffles are simple to make yet feel indulgent, making them the perfect snack for any occasion. Whether for a party or an everyday treat, they always impress and leave everyone craving more. Trust me, these little delights are a must-try!
When I first attempted making chocolate cheesecake truffles, I was amazed at how effortlessly they came together. The combination of cream cheese, sugar, and chocolate truly captures the essence of a cheesecake, yet in a much more playful form. I learned that using quality chocolate makes a huge difference in flavor, so I always opt for semi-sweet or dark chocolate.
One of my favorite tips is to chill the truffles before coating them in chocolate because it helps them hold their shape and makes the coating process much easier. Plus, you can get creative with toppings—think crushed nuts or colorful sprinkles for a fun touch!
Why You'll Love These Truffles
- Rich chocolate flavor paired with creamy cheesecake goodness
- Perfectly sized for sharing or indulging alone
- Customizable with various toppings and flavors
Perfecting Your Cheesecake Filling
The key to a velvety cheesecake filling lies in the temperature of your cream cheese. Ensure it's at room temperature for optimal blending; cold cream cheese can lead to lumps in your mixture. I like to set mine out for about an hour before starting. Beat the cream cheese with the powdered sugar and vanilla until completely smooth, a process which usually takes about 2-3 minutes on medium speed.
Don’t be shy with the vanilla extract as it brings depth to the flavor profile. You can also experiment with different extracts such as almond or orange for a unique twist. The sweetness from the powdered sugar should balance the tangy cream cheese, so taste and adjust before chilling.
Rolling and Coating Techniques
When rolling the truffles, I recommend using a small cookie scoop to ensure uniformity in size. This not only makes the truffles visually appealing but also ensures even melting times when you coat them. Aim for about a tablespoon of mixture for each truffle. If the mixture feels too sticky, dampen your hands slightly with water to make rolling easier.
For the coating, ensure your chocolate is fully melted and smooth to achieve a glossy finish. If your chocolate appears grainy or thick, add a teaspoon of coconut oil or vegetable shortening to help it achieve a more fluid consistency. This step is crucial as it helps the chocolate coat evenly and adhere to the truffle without clumping.
Ingredients
- Ingredients:
For the Truffles
- 8 oz cream cheese, softened
- 1/2 cup powdered sugar
- 1 teaspoon vanilla extract
- 1 cup semi-sweet chocolate chips
- 2 tablespoons unsweetened cocoa powder
For Coating
- 1 cup semi-sweet chocolate chips (for coating)
- Sprinkles, crushed nuts, or cocoa powder (for garnish)
Make sure to have all ingredients ready before you start!
Instructions
- Steps:
Prepare the Cheesecake Mixture
In a mixing bowl, blend the softened cream cheese, powdered sugar, and vanilla extract until smooth and creamy. Make sure to scrape down the sides of the bowl for an even mixture.
Chill the Mixture
Cover the mixture and place it in the refrigerator for about 15 minutes, allowing it to firm up slightly. This makes it easier to roll into balls.
Form the Truffles
Once chilled, scoop out small portions of the cheesecake mixture and roll them into bite-sized balls with your hands. Place them on a parchment-lined baking sheet and return to the fridge for another 15 minutes.
Melt the Coating
In a microwave-safe bowl, melt the semi-sweet chocolate chips in 30-second intervals, stirring in between until fully melted and smooth.
Coat the Truffles
Dip each cheesecake ball into the melted chocolate, allowing any excess to drip off before placing them back on the parchment paper. Quickly add desired toppings before the chocolate sets.
Set and Serve
Let the coated truffles sit at room temperature for about 10 minutes, then place them in the fridge for an additional 15 minutes to fully set. Enjoy your homemade chocolate cheesecake truffles!
Perfect for sharing or savoring alone, these truffles are sure to impress!
Pro Tips
- For added flavor, try mixing in some orange zest into the cheesecake mixture, or use flavored chocolate for coating. Experiment with toppings for a unique touch!
Storing Your Truffles
Once your chocolate cheesecake truffles are set, store them in an airtight container in the refrigerator for up to a week. Take care to separate layers with parchment paper to prevent sticking. If you want to keep them longer, consider freezing them; they can stay fresh for up to three months. Just make sure they are well-sealed to avoid freezer burn.
To thaw, simply transfer them to the fridge for a few hours before enjoying. While they’ll maintain their delicious taste, the chocolate coating may lose a bit of its initial snap after freezing, so enjoy their freshly dipped texture whenever possible!
Flavor Variations and Add-Ins
Feel free to customize your truffles by adding various flavorings to the cheesecake mixture. For instance, crushed Oreos or a swirl of raspberry sauce can elevate your truffles to new heights. Another fun idea is to mix in a tablespoon of espresso powder to enhance the chocolate flavor and add a delightful coffee kick.
When it comes to toppings, don’t hesitate to get creative. Crushed pretzels can introduce a savory crunch, while coconut flakes add a tropical twist. For a richer experience, consider rolling the truffles in melted chocolate again after the initial coating for an extra indulgent layer.
Questions About Recipes
→ Can I use other types of chocolate?
Absolutely! You can use dark chocolate, milk chocolate, or even white chocolate for different flavor profiles.
→ How long do the truffles last?
When stored in an airtight container in the refrigerator, these truffles can last up to one week.
→ Can I freeze the truffles?
Yes, these truffles freeze well! Just make sure to store them in a freezer-safe container and allow them to thaw before serving.
→ What can I use instead of cream cheese?
You can substitute with a vegan cream cheese or a mascarpone cheese for a different texture and flavor, although the taste will change slightly.
Chocolate Cheesecake Truffles
Created by: Olivia Barrett
Recipe Type: Pastry Dreams
Skill Level: Intermediate
Final Quantity: 24 truffles
What You'll Need
For the Truffles
- 8 oz cream cheese, softened
- 1/2 cup powdered sugar
- 1 teaspoon vanilla extract
- 1 cup semi-sweet chocolate chips
- 2 tablespoons unsweetened cocoa powder
For Coating
- 1 cup semi-sweet chocolate chips (for coating)
- Sprinkles, crushed nuts, or cocoa powder (for garnish)
How-To Steps
In a mixing bowl, blend the softened cream cheese, powdered sugar, and vanilla extract until smooth and creamy. Make sure to scrape down the sides of the bowl for an even mixture.
Cover the mixture and place it in the refrigerator for about 15 minutes, allowing it to firm up slightly. This makes it easier to roll into balls.
Once chilled, scoop out small portions of the cheesecake mixture and roll them into bite-sized balls with your hands. Place them on a parchment-lined baking sheet and return to the fridge for another 15 minutes.
In a microwave-safe bowl, melt the semi-sweet chocolate chips in 30-second intervals, stirring in between until fully melted and smooth.
Dip each cheesecake ball into the melted chocolate, allowing any excess to drip off before placing them back on the parchment paper. Quickly add desired toppings before the chocolate sets.
Let the coated truffles sit at room temperature for about 10 minutes, then place them in the fridge for an additional 15 minutes to fully set. Enjoy your homemade chocolate cheesecake truffles!
Extra Tips
- For added flavor, try mixing in some orange zest into the cheesecake mixture, or use flavored chocolate for coating. Experiment with toppings for a unique touch!
Nutritional Breakdown (Per Serving)
- Calories: 160 kcal
- Total Fat: 10g
- Saturated Fat: 6g
- Cholesterol: 28mg
- Sodium: 50mg
- Total Carbohydrates: 16g
- Dietary Fiber: 1g
- Sugars: 11g
- Protein: 2g